
 All Caps
 ScopeCaps
 LightCaps
 Red Dot Caps
 Night Vision Caps
 Thermal Caps
 Specialty Caps
 Lights
 Red Dots/HWS
 Magnified Optics
 Lasers
 Slings
 Night Vision Devices
 Thermal
 Helmets
 Accessories
 Camouflage
 Water
Water
 Faraday
 EDC
EDC
 Apparel
Common Gear Mistakes That Increase Your Visual Signature
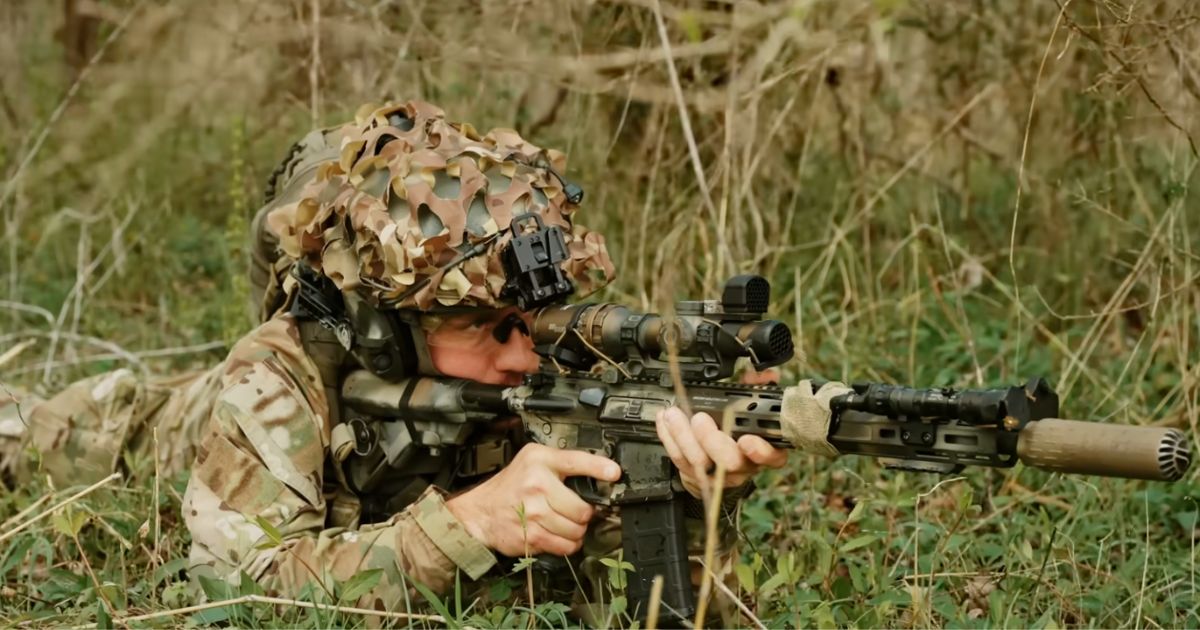
Good visual concealment depends on more than choosing gear in the right color or camouflage pattern. Small details across your rifle and kit can create a visual signature through reflection, contrast, recognizable shapes, and unnecessary movement.
Some of those problems are easy to miss because they seem minor when you look at each piece of gear on its own. So knowing what to look for makes those weak points easier to find. The following gear mistakes give you a place to start.
Mistake #1: Leaving Reflective Surfaces Exposed
Reflective surfaces can create flashes or bright spots that look different from the surrounding area. Optics are an obvious place to check, but they are not the only source.
Exposed Optics and Lenses
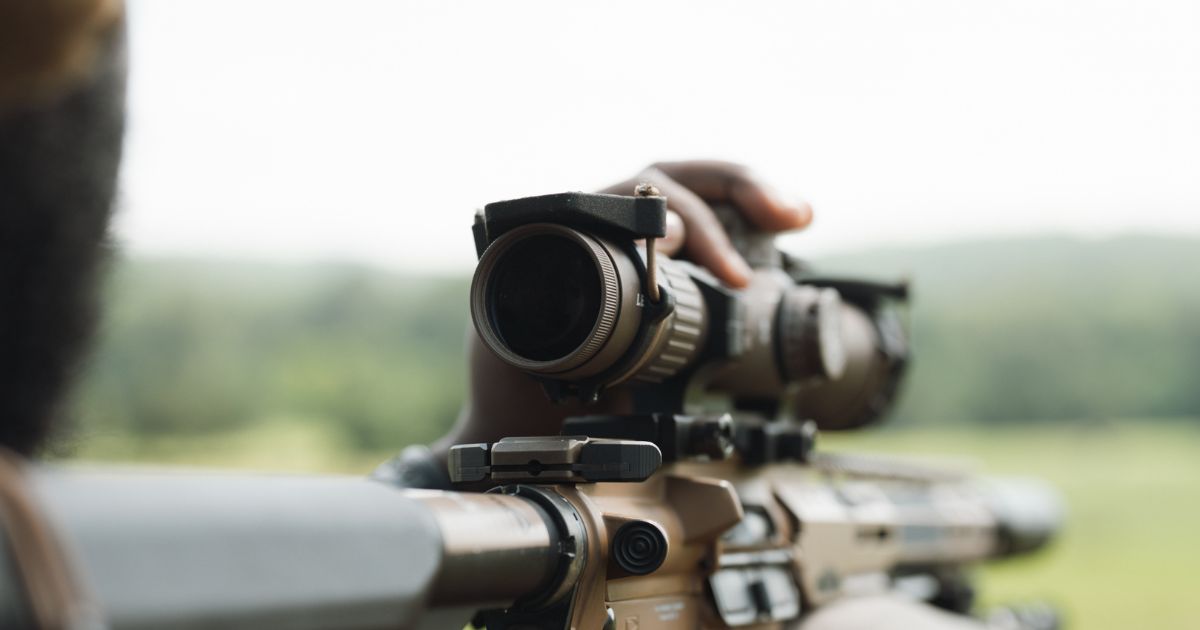
An exposed objective lens can reflect available light under the right conditions. How noticeable that reflection becomes depends on the light source, the angle of the lens, and the observer’s position.
That means scope glint is not constant, but it’s still worth accounting for. An anti-reflection device (ARD), such as the ScopeCap Pro, can help reduce reflections from the lens while still allowing you to use the optic normally.
Shiny Mounts and Hardware
Scope mounts, fasteners, buckles, clips, and other hardware can also reflect light. And wear makes this more noticeable over time. A scratched coating or polished contact point exposes a smoother surface that reflects differently from the matte equipment around it.
Check the complete rifle and the gear you carry with it. A covered optic does not address a shiny mount, an exposed fastener, or a reflective piece of hardware elsewhere in your setup.
Mistake #2: Creating Shapes That Look Too Clean
Ask yourself a simple question: Could someone recognize this piece of gear from its outline alone? Color matters for visual concealment, but a familiar shape still makes equipment easier to identify.
Straight Lines Are Easy to Pick Out
Rifles naturally create long, consistent lines. Barrels, handguards, optics, and slings form shapes that look noticeably different from branches, brush, rocks, and other irregular surroundings.
Matching your gear to the surrounding colors only addresses part of the problem. Breaking up recognizable lines and edges makes the rifle's overall form less obvious. But you don’t need to hide every edge. Focus on the parts that make the equipment immediately recognizable from a distance.
Uniform Gear Can Create One Large Shape
A setup with the same smooth texture from end to end can create a clean, continuous silhouette. Even if the color fits the environment, that consistent form can still be easy to recognize.
Adding some irregularity helps break up that outline. Scrim is one option because it adds texture around distinct edges and changes the equipment's shape without requiring you to cover everything, since the goal is purposeful disruption. Add enough texture to make familiar shapes less obvious without creating bulk or interfering with how you use the gear.

Mistake #3: Ignoring Contrast Between Gear and the Environment
Another useful question is: Does this piece of gear visually separate from what is behind it? Something does not need to be brightly colored to stand out. It only needs enough contrast with its immediate background.
Matching Color Is Not the Same as Reducing Contrast
An earth-tone rifle or piece of gear can still be noticeably lighter or darker than the area around it. A tan surface against deep green vegetation, for example, creates more contrast than you expect.
Light and shadow also change that relationship throughout the day. Gear that blends into a sunlit background can become much more obvious once you move into shade. So instead of asking only whether the color is appropriate, look at the difference between your gear and the background you are actually using.
Small Contrasting Details Can Stand Out
Contrast also comes from small parts of your setup. Look closely for details such as:
- Logos or labels that stand apart from the surrounding material.
- Light-colored cords that create noticeable lines across darker gear.
- Tape that does not match the surface value around it.
- Exposed hardware that appears noticeably lighter or darker.
- Worn equipment where scratches or abrasion reveal a different surface beneath the original coating.
Inspect these details against your actual surroundings rather than judging them by themselves. Small differences that seem insignificant indoors become much easier to notice against a consistent background.
Mistake #4: Letting Gear Move When You Don’t Want It To
Your gear can create movement even when you are trying to stay still or move carefully. Loose parts swing, bounce, or shift independently, adding motion that is separate from what your body is doing.
Loose Gear Creates Independent Movement
Sling tails, straps, cords, and other unsecured items can move in the wind or swing as you walk. They may also continue moving for a moment after you stop or reposition.
Check for anything that moves more than it needs to. Securing loose material helps reduce unnecessary motion while keeping the equipment accessible and functional.
Hanging Gear Changes Your Silhouette
Gear does not have to move to affect your profile. Equipment that hangs away from your body or rifle can add noticeable shapes to your silhouette.
Bulky pouches, poorly positioned accessories, and gear that protrudes farther than necessary all change the outline you present. Look at your setup from different angles and identify anything that sticks out without serving a clear purpose.
Mistake #5: Forgetting About the Weapon Light When It’s Off
A weapon light does not have to be on to affect your visual signature. Its exposed lens can catch available light, while the housing may create contrast or add another recognizable shape to the rifle.
Treat the light like any other part of your setup. Look at how the lens and housing appear from different angles rather than assuming they disappear when the light is off.
A cover such as the LightCap keeps the lens covered when the light is not in use without adding unnecessary complexity. It also supports the larger goal of white light discipline, which we cover in more detail in White Light Discipline Is More Than Just Covering the Lens.

Mistake #6: Fixing Individual Gear Instead of Evaluating the Whole Setup
Fixing one obvious problem does not mean the rest of your setup disappears. You might cover an exposed optic while still carrying a shiny mount, uncovered light lens, loose sling tail, or rifle with an easy-to-recognize outline.
Those details stack together and create several visual cues at once. Adding more camouflage is not always the answer, either. Extra material adds bulk, movement, or new shapes without addressing the actual problem.
Instead of checking one accessory at a time, evaluate the rifle and your gear as a complete setup. Let’s take a closer look at how to do that.
How to Audit Your Gear for Visual Concealment
Instead of judging each item by itself, inspect your complete setup under conditions that are close to how you actually use it.
Start With the Setup as You Use It
Set up your rifle with the optic, weapon light, sling, and other accessories you normally carry. Wear your usual equipment as well.
Then look at the complete setup from different angles. If possible, check it against the terrain and vegetation where you expect to use it. Changes in direction, background, light, and shadow can reveal problems you won't always notice indoors.
Run a Four-Part Visual Signature Check
Use four visual cues to guide your inspection: Reflection → Contrast → Shape → Movement.
Ask yourself:
- Reflection: What catches or redirects light?
- Contrast: What looks noticeably lighter, darker, or different from the background?
- Shape: What creates a recognizable outline or clean edge?
- Movement: What shifts, swings, or moves independently?
Run the same check from multiple angles. Something that blends from the front may become much easier to notice from the side or against a different background.
Change What Actually Creates a Problem
Start with the weak points you clearly identify. Secure loose equipment, address reflective surfaces where appropriate, and break up recognizable shapes when they stand out. Then check the setup again. This lets you see whether each change actually reduced the visual cue you noticed.
The goal is not to cover every surface or add as much camouflage as possible, but to build a functional setup with fewer unnecessary signatures while keeping your equipment accessible and useful.
To learn more about signature reduction, read The 7 S’s of Camouflage: A Guide to Signature Reduction.
Build Visual Concealment Around the Complete Setup
Look at your rifle and kit as a complete system. Check for reflection, contrast, recognizable shapes, and unnecessary movement, then make targeted changes where they matter.
Explore One Hundred Concepts' purpose-driven gear to find practical ways to refine your setup while keeping it ready to use.

Leave a comment
This site is protected by hCaptcha and the hCaptcha Privacy Policy and Terms of Service apply.